
This tutorial is designed to give you that little bit extra from your embroidery machine. I mentioned yesterday that I was back on the fish quilt - I think its last showing was way back last year. I have been adding mossy rocks, and ferns and other leafy bits. Sometimes you just don't quite get the look you are after! After embroidering your little heart out sewing leaves over other leaves your work looks flat and lifeless and a bit of a mess.

I wasn't happy with the leaves over the ferns, so I set to work with Embird and "chopped up" the plants. The leaves were reasonably plain without any fiddly holes to deal with. I copied and flipped sets until the largest hoop was filled. Do not colour sort when you are doing a large batch of designs. Whilst it is a bit of a pain with machines that are single needle models, I have found that there is a lesser chance of the designs starting to "go out of whack" (for want of a better term) as the stitching progresses. That is my theory anyway!
Hoop some stabilizer and a layer of organza. The organza can be any colour, although I would aim to either match the designs colours or that of the background. I use black a lot! The type of stabilizer you use is up to you. The leaves I was planning to stitch were pretty straight forward and didn't need to be soft, so I used a tearaway stabilizer. If you are doing something lacy or delicate then the best stabilizer for the job would be a wash away. If the designs are really dense and could pull out of shape whilst embroidering is underway, you might think about using two layers of organza.

You can see in the photo above how I saved the designs ready to sew. You may also be able to see that the two colours used for the leaves are alternated, as I did not colour sort. Below shows the leaves in the process of being stitched in the big hoop. I managed to fit 19 leaf segments into one hooping.

Here they are all sewn out!

If you are using tear away, remove all of it now. If you are using washaway, wash it away now. I find with washaway, the pieces may need to be soaked a couple of times to remove all of it. Trim the organza close, but not too close to the edge of the design.

It is perfectly ok to have pokies!

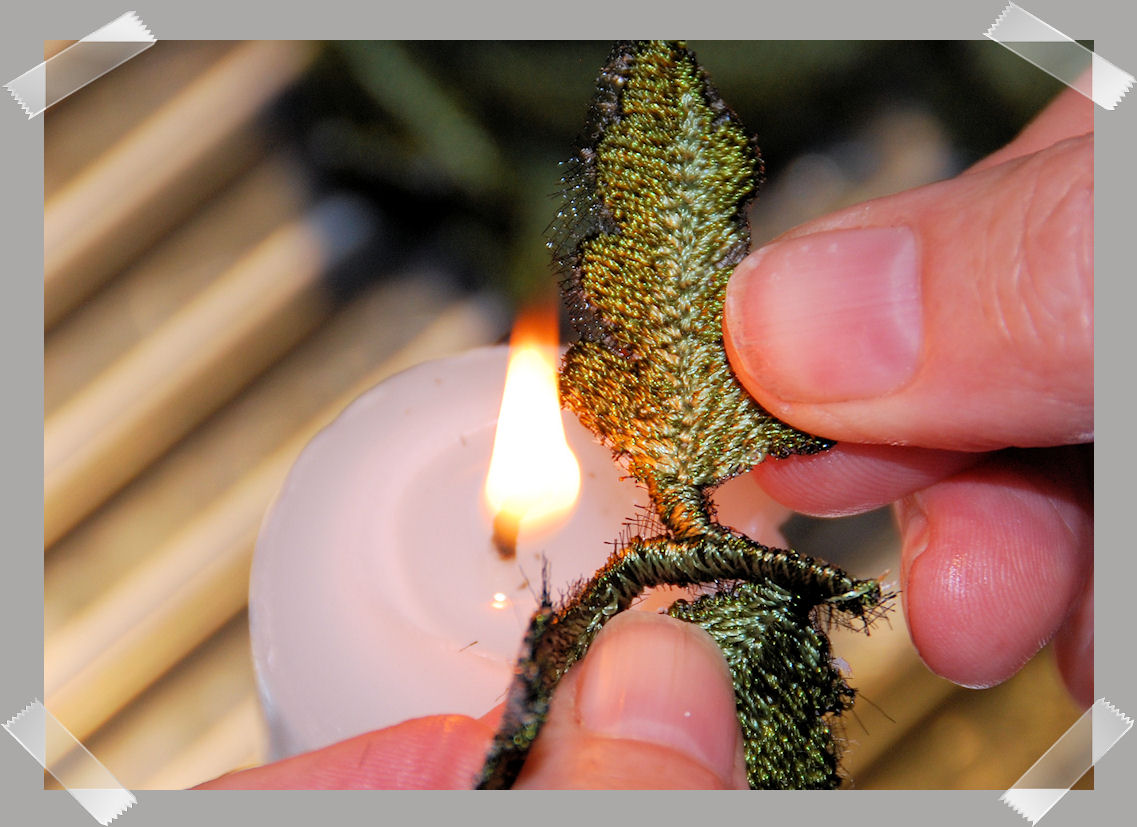
Now comes the fun bit. Make sure the designs are wet - not dripping wet, just well wet. I work at the kitchen sink on the drainer - just make sure it is fire proof! If you are feeling nervous, don't be. Have a bowl of water beside you or some water in the sink just in case. I use a chunky candle for the next part. You won't have to worry about knocking it over (I don't spend too much time worrying about these things, but I know some do!).

Hold the design close to the flame, but not in it. Because the embroidery is damp, only the organza will melt. Move the design along the flame. If you do a practice with one or two pieces, you will soon get the idea about what will work and what won't.


Tight corners can be dealt with by a bit of manipulation. You can pull the pieces apart as you hold it close to the flame, then go back and burn out any bits you don't want.
When you have finished, place the embroideries face down on the ironing board and give a good shot of steam - when they are dry, they are ready to go - I did press mine until they were dry because as usual I was in a hurry......

They are now ready for placement. I should also add, if you used washaway you may find when the iron hits the embroideries, they may still be a bit tacky, just put them back into some warm water and leave to soak for a while and try again with the iron.
Set your sewing machine up for free motion - darning foot on, embroidery needle in, feed dogs down and for the stitching, I use a zigzag set at length (1) and width (2). Thread up with a suitable coloured embroidery thread for the top and bobbinfil for the back. Loosen off the top tension by a couple of notches - down from your normal sewing position. This ensures that the top thread is pulled through to the back of your work and no bobbin thread will be visible on the front of your work.
Position your embroideries as required and start stitching into place. You can go "around" as many times as you like but once is usually enough.


Here they are in place.


NOTE: Some embroideries are designed to be "free standing". There are many laces etc designed specifically for the purpose of being sewn onto wash away stabilizers with no need for organza. I sew lots of embroideries on to organza and make them into applique motifs by using either the above method (with fire) or by using a stencil burner. Stencil burners have a variety of points and are used a bit like a hot knife through butter. I place the embroidered piece on a ceramic tile I have specifically for the purpose. Sometimes (after a lot of cutting) you may have to stop and turn off the stencil burner and once cooled, clean the tip. This is why I like "fire" for simplified designs, but a stencil burner gives you more control when cutting fiddly designs.
The methods I have described above, would also work if you appliqued on to organza or did free motion work, that you wanted to add to a piece. Sometimes when doing a lot of "artwork" by machine on a piece, the fabric starts to distort, or you may be concerned that your machine (either in embroidery mode or stitching) is not going to be able to stitch through the background work. Doing some of the pieces separately and then stitching in place, helps to solve these problems. It also gives a lot of freedom when you are working in layers - and you want to weave pieces in and out. It is far simpler with a separate piece.
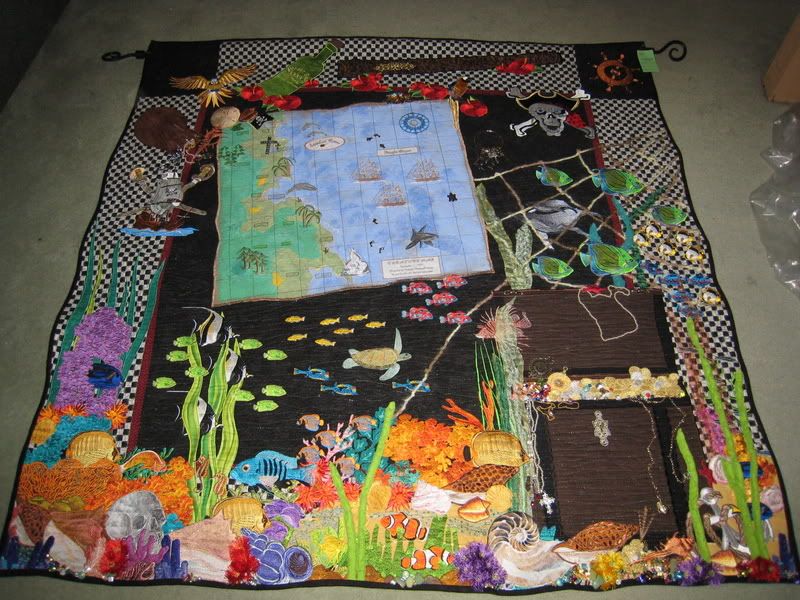
You can see examples of that here on my Pirate Quilt. If you look at the fish swimming through the some of the weed, I was able to weave them so they looked like they were coming through the seaweed, rather than just plonking them either at the back or in front. The other area where making some free standing pieces proved to be invaluable was in the large piece of purple coral on the left border. I sewed the coral, cut out the organza in the centre and then added the fish - I could then play with how much of the fish would be visible. (If you want to see more of the Pirate Quilt and some of the others I have completed, take a look in my Photobucket pages, listed on the side bar).
The above methods also make embroidering on bulky items, such as heavy jackets etc a breeze and if there is a "stuff up" it is easier to re hoop and do another embroidery than having to start trying to remove stitches. You can also "hide" problems - if something has gone awry on your item. If it helps to remove bulk, you can cut out behind the embroidery!
The following photo's show some of the elements I have added so far:
Bubbles/foam - more stitching will be added to this, possibly in the quilting phase.

A little frog waiting for some leaves for camouflage!


If you don't find my instructions clear or you want more information, feel free to contact me at tiramisue at bigpond dot com - there is a link on the side bar - I am always happy to try and help!!
Bye for now. Sue xxx
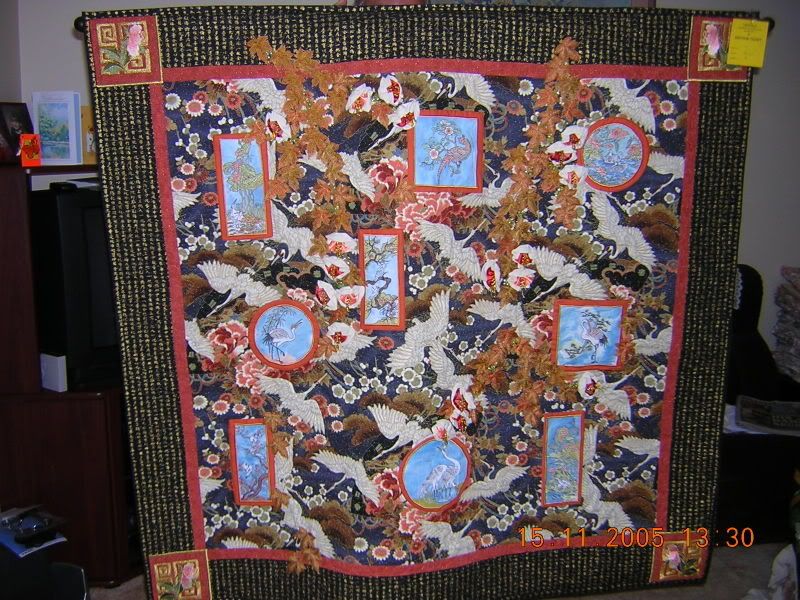
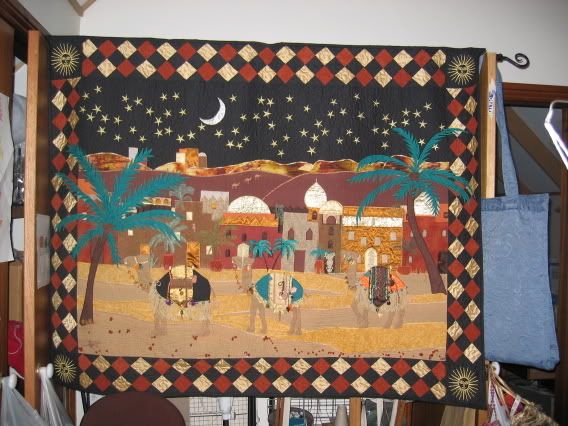
PS I have now added pictures of some of the quilts I have finished over the years. They are listed under Quilts I Have Made (duhh) over on the side bar. All links will go directly to photographs - More closeup photo's are available in my various Photobucket Pages (also listed).
Bye for now. Sue xxx
PS I have now added pictures of some of the quilts I have finished over the years. They are listed under Quilts I Have Made (duhh) over on the side bar. All links will go directly to photographs - More closeup photo's are available in my various Photobucket Pages (also listed).

 Quilter Blogs & Store Search
Thanks for the good info and nice tut.
ReplyDelete