
First collect your supplies up. Spread them carefully on your work surface. Work out your colour scheme. Allow the cat into your room where it will proceed to send everything flying. Pick up supplies from floor. Scream at cat and then cut your beading elastic to size. I cut mine to about 8 or 9 inches. You need to have some over to tie the knot - the longer the tails, the easier it is at the end.

The skulls didn't make the grade for this project - but they are very striking. Thread beads on to the elastic as desired.

Thread enough beads to fit the wrist loosely - you don't want the beading elastic to show when wearing the bracelet. Make sure the last bead has a large enough hole to take the knot. I used a silver bead for this bracelet.

I tried a few times without success to do a reef knot, so I went ahead and just did a tie off type knot, take the two ends of the elastic together and tie a knot. Simple, but did the job.

Carefully work the knot into its correct position - remember the elastic should not be pulled tight. The job of the elastic is to slide over the hand and stay in position without overstretching - otherwise even without the cats' help, you will be picking beads up off the floor!

When you are happy that the knot is tight, adjust the beads and trim the elastic leaving small tails. Work the knot into the bead. The secret to keeping the knot both in position and from working open, is just a tiny dab of glue. I used the Gel (non drip - supposedly) variety of Superglue.

Leave to dry for 24 hours if possible. Simple and effective. I added some charms to my bracelets. I am not very good at working with the jump rings - I can never get them to close properly. I have been using split rings and find them a little bit of a fiddle getting the charm on to start, but they do stay put. If you don't know the type of rings I am talking about, they are a very tiny version of the key ring. They are available in both silver and gold, and probably other metals as well.


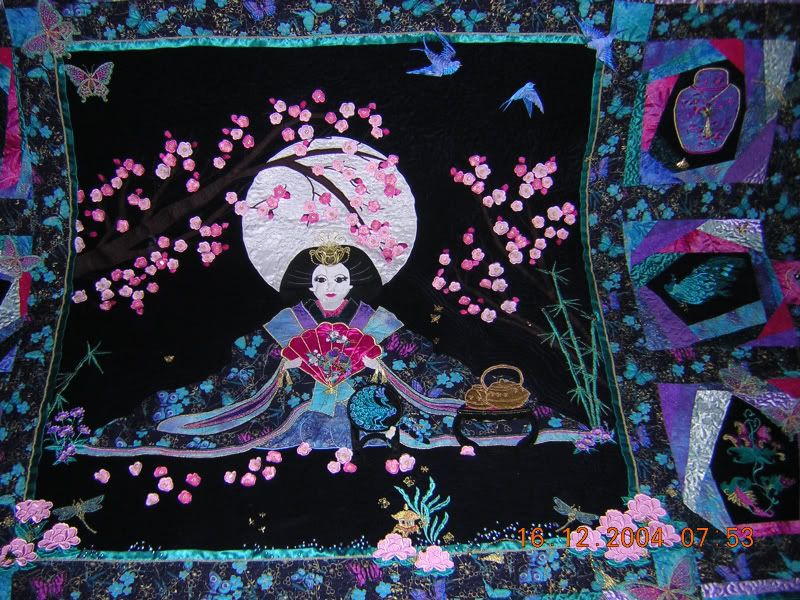
On the machine embroidery front, I have been designing some Babushka's for Christmas. They all stitched out beautifully, and I made alterations as necessary. I put together a table runner. Very Christmassy.
It was quilted and bound, but then I needed to wash it to remove the blue pen I had used to mark out the holly positions for quilting. Doesn't show it off to its best in black and white I hear you say. Of course it doesn't. Black and white is the only way I can show it now - after hours of work and amazingly perfect positioning in a row - the red backing fabric ran and ran and ran. I had washed all the fabric before hand in hot water to get rid of any problems, and it was all dried in the dryer, but no tragedy struck. I put the whole thing in some of the product "Runaway" but that seemed to make things go from bad to worse. As soon as it hit the water, the red colour came straight out of the white, but so too did some of the colour in the green. The green went from bright and cheery to olive and unattractive. In fact, the stuff is so strong that it even altered one of the embroidery threads which is polyester and shouldn't be affected. So another lesson in what not to do.

Here are the second tested Babushka's. I had hoped to have them up on my Etsy site, but it looks like they will be ready for next year now. The red in the body of the wall hanging is not the problem - it was a broadcloth from Spotlight.

Can you see the holly outline I did in the quilting. Never mind.

Bye for now.
Sue xxx

 Quilter Blogs & Store Search
If you scroll up to the second bracelet photo from the bottom, that's mine on the left with the blue beads - and the froggy!!!! Sue must have known that my second-favourite animal is the green tree frog - and she made this one for me for Christmas - lucky, lucky me!
ReplyDeleteA great way to make beautiful bracelets that are so easy to put on and wear!
Thanks Sue!
PS Of course, you all know what my very favourite animal is! (Don't you!?!)