
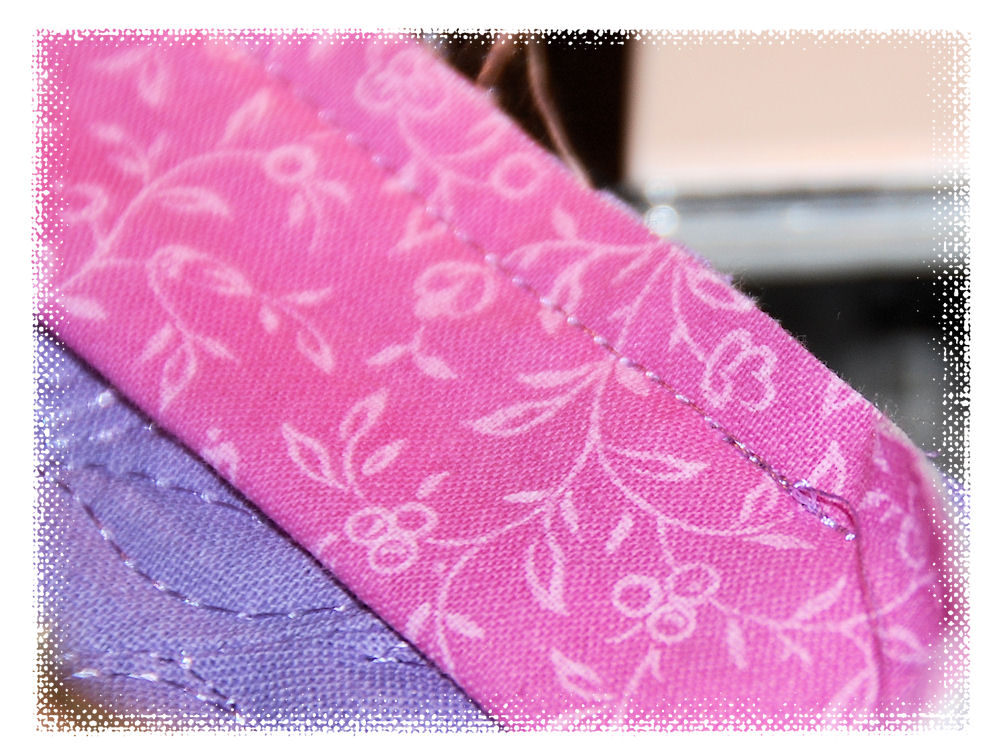
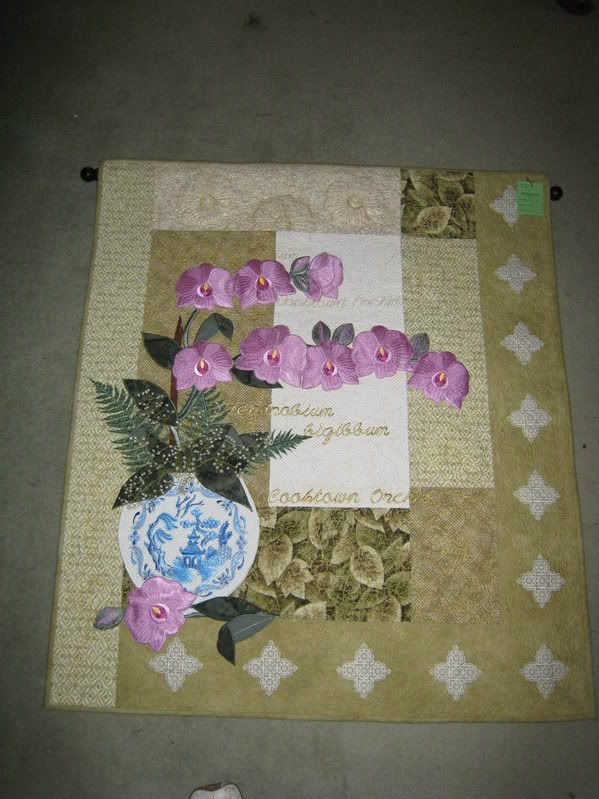
As I mentioned on the last post, here is another way to complete the flowers. In this example, I used some hand dyed fabric. Again the squares were cut at 6 1/2 inches. The following arrangement uses 6 petals to form the flowers.

For this flower, I stitched a centre line through each petal, directly on to the backing fabric. As each petal was stitched into shape, I folded the other petals out of the way. From memory I did every second petal first and then finished the others.


For the centre of this flower, which was quite large, I cut a strip of organza on the bias (1 1/2 inches wide) and then stitched through the centre of the fabric, forming a concentric circle. The outer layer of the organza was then stitch down using the free motion foot.

The pink and purple flower quilt were completed using the "quilt as you go" method. My theory for using this method, was that I could work on a small piece (I have a bulging disc at the minute, so needed to pace myself at the machine) and complete each block ready to put together.
Cut backing and wadding the same size as your block.....

Quilt as desired........

I join my blocks together with a wide zigzag.

I cut strips of fabric, folded them in half, then unfolded and refolded, this time with the raw edges in to the centre (just like making bias binding, only without the bias part). Using my faithful glue stick, I attached the strips between each block, and stitched in place, firstly with a straight stitch - just to keep everything in place and then with a decorative stitch.

Each row of blocks was then joined in the same way. The back needed to be taken care of next, and although a little messy in spots, I thought I would give same lace a try to cover the seams - these were hand stitched in place. I used a lace which had no directional qualities (well not noticeable anyway). My original plan was that the quilt would be a wall hanging but the lace seems pretty hardy so I think it would work for any application.


The binding was done in two fabrics. When stitched in place, it gives a look of a piped edge and raises the opportunity to add more colour - as if there wasn't enough already.

Cut one half of the binding at 1 1/2 inches wide and the other piece at 1 1/4inch wide. Join with a 1/4 inch seam. I pressed towards the lighter fabric (the thinner piece). Now fold in half and press again - you will see just a little of the wider fabric. Of course, you can make these any width you like and vary the amount of secondary colour that will be seen. Again I used a little of the good ole glue stick to tack things down as I pressed. As it is water based it will wash right out at the end.

Next step is to attach the binding to the back of the quilt. Normally you would attach it to the front. For those of you who like to do quick quilts, may I say, this is a much faster method and so neat on the back if you like to sew your binding on and down with the sewing machine. There are no surprise bits, like finding that you have sewn all the way around from the front, only to discover that you have not folded as well as you should and you have missed bits.
Mitering the corners is exactly the same, just in reverse.

Fold carefully on the corners, I use a needle or the quick unpick to get nice sharp corners.

And the beauty of this method is that you can do a bit more decorative stitching if you wish, or you can just stitch in the ditch (if you stitch on the line between the dark and light fabric the piping would be loose and look more like piping).

Now for those of you following the O'Reilly dog, here are a few photo's. I apologise for the quality - my phone was the only thing close to hand.
We all know the classic lines from Sylvester and Tweety - I tawt I taw a puddy tad - well you might have seen a pussy cat Tweety, but you didn't notice O'Reilly sneaking up from behind did you? No.....
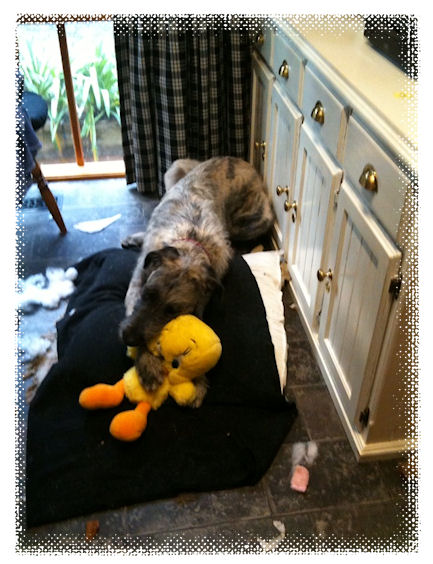
Figure 4 Head Lock


And a question I ask many times a day these days - why? If you get so comfortable on this setup.....

.......why would you do this?

On a floral note, finally, previous comments about funereal bouquets have been taken on board and red roses surfaced for a wedding anniversary. All flowers these days are the "focus" (pun intended) of photographic endeavours.

Bye for now.
Sue xxx

 Quilter Blogs & Store Search
He's almost human! Your life sounds like a magazine column - or maybe there's a book in there somewhere? You really need to blog Norman in the goldfish bowl.....
ReplyDeleteLiz
I love the pink green and white leaf quilt its so cute ♥ and O'Reilly is super cute :)
ReplyDelete