
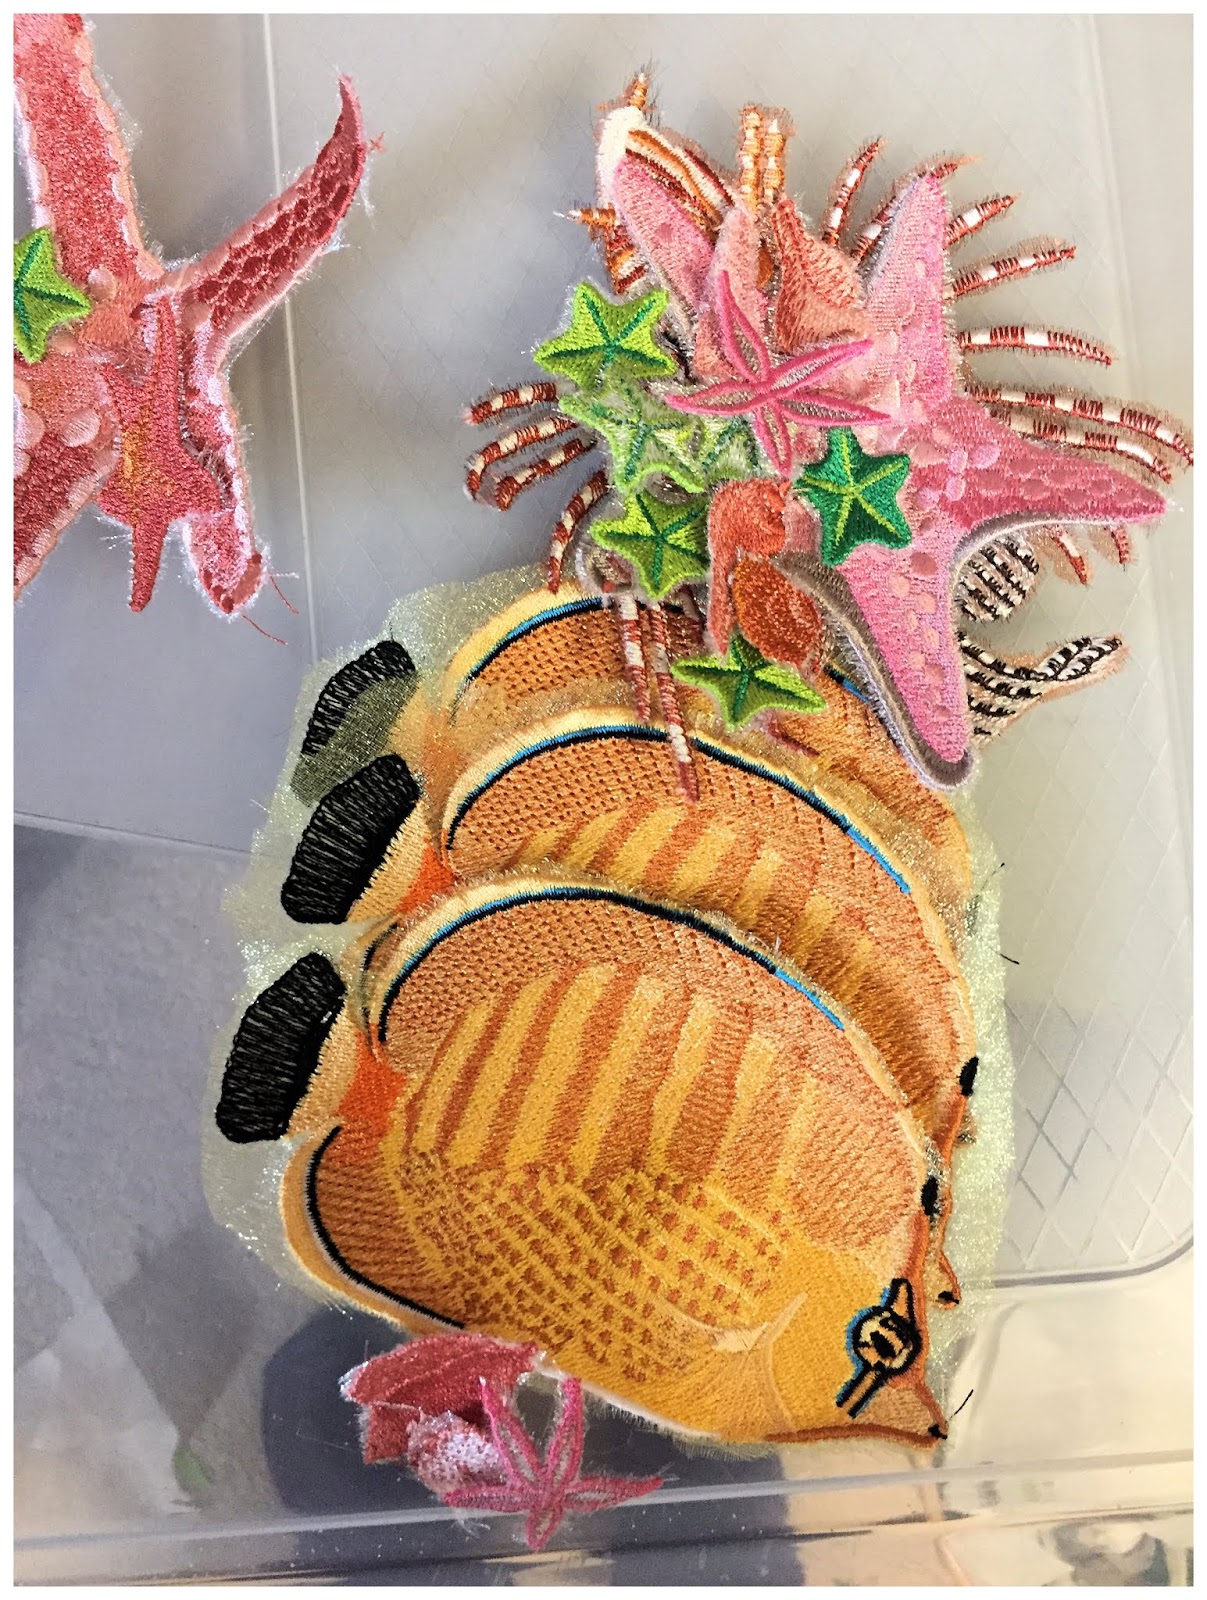
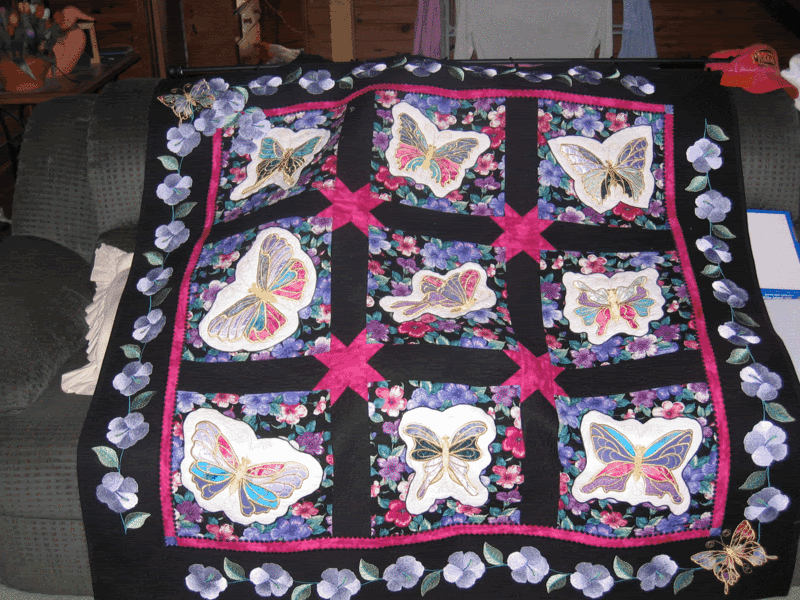
First you must evaluate the design itself. If it is solid with no light filled areas like the fish and sea shells you can see below, then I hoop two layers of normal tear away stabilizer and one or two layers of organza together in the hoop. How many layers can vary - you have to think about the size of the embroideries and whether you have chosen enough layers to keep the design together whilst it stitches out in the hoop. Using tearaway for the solid designs makes the process a little faster. If you think you can remove the stabilizer at the end of the embroidery with your fingers, needles, tweezers or weapon of choice, tearaway is suitable.
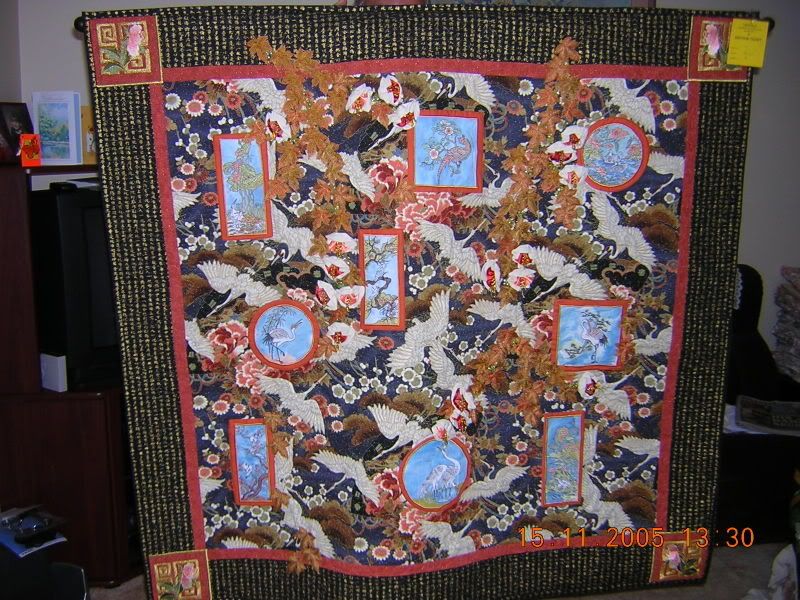
If the design has lots of visible space or light stitching, then I would use and recommend a mix of Wash Away type stabilizer and one or two layers of organza. Instead of picking bits of stabilizer out, soak in hot water for a couple of hours and then give a good wash to get rid of the remnants of washaway. If you don't soak for long enough, the pieces will be stiff. This is not necessarily a bad thing but I like to give all my pieces a good press with a pressing cloth and leftover stabilizer on damp motifs is sticky. As I said, this is my way of dealing with stabilizers, if you have a preferred method, do it your way.


A few items to have in your embroidery stash - a wood burning/stencil tool and either one of those glass cutting boards or a ceramic tile, a sturdy candle and a face mask - one of the ones with a filter not the cheap paper ones. DO WORK IN A WELL VENTILATED AREA.
I find the wood burning tool can at times be a little messy so generally use a candle for all my melting. But if you aren't sure about live flames, the tool is fine, just keep some steel wool handy to clean the tip. I only have a basic one from Bunnings and there is no temperature control, so once it gets hot, man it gets HOT.
The candle method is not without it dangers! You should work on a surface like a steel sink - I use the draining board for my fire workings. Fill the sink with some cold water in case you set a motif alight. Try to remember to throw the piece in the sink, instead of running around the house screaming you are on fire.
It is worth making your pieces slightly damp before you start to limit the fire element.
Light the candle and put your glasses on so you can see what you are doing. You will see there is the flame and at the outer edge of the flame is your prime melting area. The edge of the motif really only has to glance the flame, not go into it. It takes a bit of practice. You just want the edges of the organza to dissolve/melt into the embroidered stitches. You can pull on the edges as you go around to melt bits you couldn't trim with the scissors. If you have a hole within a design, carefully hold the embroidery above the flame and watch it melt. Keep the wick of the candle short so the flame is not a replica of a flame thrower. If you find the flame is getting bigger as you go, blow it out, give it a rest for a minute, check the wick and start again.
Once all the pieces are cleaned up, put them face down on a towel, spritz with water, cover with a piece of cloth for protection and give them a good press.
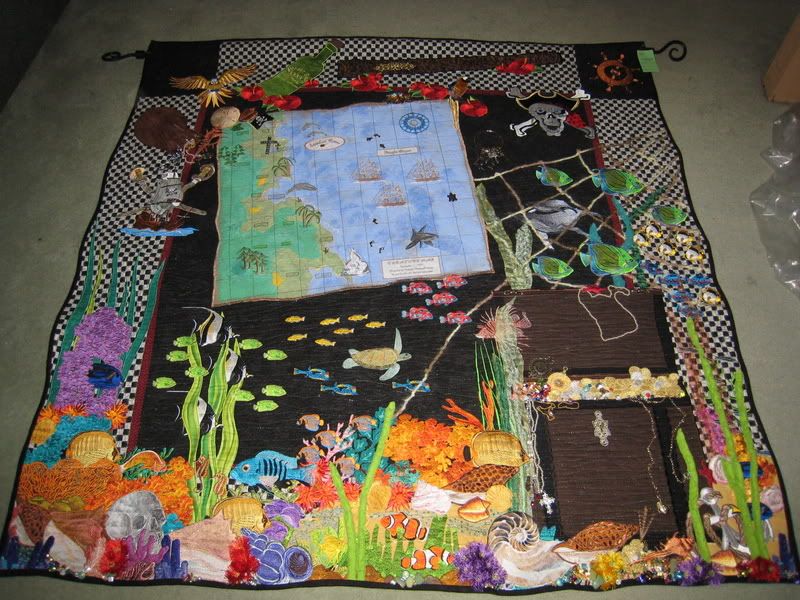
The pieces are pretty sturdy so I normally just add a fabric glue dot to keep them in place whilst I stitch. It is a great idea to take photos whilst you are laying out the designs, because some will always fall off!
I stitch the pieces down free motion, with a mixture of straight stitch and zig zag depending on the look needed.
Sue xxx

 Quilter Blogs & Store Search
No comments:
Post a Comment
I would love to hear from you, just so I know I am not talking to myself - the cat is tired and so is the dog!